Apple watch 7 45MM Badly water damaged. Watch full video for tear down and cleaning process.
AppleFix & tech Engineers call 078394111 or 078394188 or visit 937 victoria street Hamilton New Zealand
We specialize in logic board and liquid damage repair and can fix your Laptop, MacBook, mobile phone , ipad, iphone , tablet , playstation, xbox or any other electronic gadget that has been deemed unfixable by another repair shop.
*Have a repair shop and are looking to outsource logic board repairs? We offer discounted repairs to other repair shops, schools, large organizations and government agencies. — https://applefix.co.nz/contact/
logicboard repair course in New Zealand
Skill development Job Oriented short Training course. In Latest Gadgets, Smart Mobile Phones, Tablets, Laptops, Desktops, gaming gadget, Playstation, Xbox Repair Technology.
This course is aimed / focused, to teach you to fix most common repairs an electronics repair shop could face in a practical working environment. Start your own business or increase your chances to get job quickly. https://applefix.co.nz/logicboard-repair-course/
Mail in device info read here https://applefix.co.nz/send-your-device/
Thursday, 6 February 2025
Wednesday, 5 February 2025
iPhone 15 back glass replacement Full tutorial. iphone repair Hamilton New zealand
iPhone 14, 15 or 15 pro max back glass repair is easier than previous generation iphone back glass repair. watch full video for a DIY repair guide. iphone repair experts in hamilton new zeland appleix & tech engineers 937 victoria street hamilton new zealand call 078394111 or 078394188
We specialize in logic board and liquid damage repair and can fix your Laptop, MacBook, mobile phone , ipad, iphone , tablet , playstation, xbox or any other electronic gadget that has been deemed unfixable by another repair shop.
*Have a repair shop and are looking to outsource logic board repairs? We offer discounted repairs to other repair shops, schools, large organizations and government agencies. — https://applefix.co.nz/contact/
logicboard repair course in New Zealand
Skill development Job Oriented short Training course. In Latest Gadgets, Smart Mobile Phones, Tablets, Laptops, Desktops, gaming gadget, Playstation, Xbox Repair Technology.
This course is aimed / focused, to teach you to fix most common repairs an electronics repair shop could face in a practical working environment. Start your own business or increase your chances to get job quickly. https://applefix.co.nz/logicboard-repair-course/
Mail in device info read here https://applefix.co.nz/send-your-device/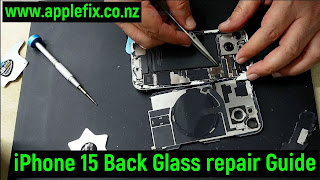

Friday, 17 January 2025
MacBook Screen Protectors | Ultra Clear, Invisible yet Strongest | Get Yours @ applwfix & tech engineers hamilton new zealand
Protection Pro Screen Protectors For Phones, Tablets,
Laptops, Watches, Cameras & car Multimedia Screens.
Become a dealer Call 078394111 or 078394188
-Dealers advantages.
-Never Lose a Sale - Always In Stock - Any Device on-Demand
-Simplify Inventory - Ask about our proven "Long
Tail" results
-Fastest design team with almost 50,000 patterns &
adding 100's every month. If we don't have it, we will add in less than 24
hours
-Maximize profit by freeing up shelf space while adding
sales opportunities
-Generate high-margin sales immediately and see why
on-demand is the future of screen protection
www.applefix.co.nz
AppleFix & Tech Engineers
937 Victoria Street
Hamilton 3204
New Zealand
Friday, 3 January 2025
MacBook A1989 screen Backlight not working repair | Macbook repair Hamilton new zealand
watch full video here https://applefix.co.nz/macbook-a1989-turns-on-no-display-macbook-backlight-repair/

Sunday, 22 December 2024
iPad 10th gen not turning on repair hamilton new zealand
watch full video here https://applefix.co.nz/ipad-10th-gen-not-turning-on-repair-hamilton-new-zealand/

AppleFix & Tech Engineers New Zealand Call 078394111 or visit 937 victoria street Hamilton New Zealand iPad 10th Generation Not Turing on | How to replace charging port on ipad 10th generation A2757 A2696 A2777.
A general guide to replace charging port on ipad 10
Replacing the charging port on an iPad 10th generation (2022) can be a complex task, requiring precision and technical skills. It involves removing internal components and safely detaching the old charging port. Here’s a step-by-step guide to help you perform the replacement:
Tools Needed:
1. Pentalobe screwdrivers
2. Phillips screwdriver
3. Plastic prying tools
4. Tweezers
5. Suction cup tool
6. SIM card ejector tool (if needed)
7. Heat pad or hairdryer (optional, for softening adhesive)
8. Replacement charging port
Preparation:
• Power Off the iPad: Ensure the device is completely powered off to avoid any damage or short circuit.
• Remove the SIM Card (if applicable): Use the SIM ejector tool to remove the SIM card tray.
Step-by-Step Replacement:
1. Heat the iPad (Optional)
• Use a heat pad or a hairdryer to soften the adhesive on the iPad’s display. Apply moderate heat for about 2-3 minutes to make it easier to remove the screen.
2. Open the iPad
• Use a suction cup tool to gently lift the screen. Place the suction cup on the screen, near the edge. If the screen is not lifting easily, use a plastic prying tool to carefully separate the screen from the frame.
• Work your way around the perimeter, ensuring you don’t apply too much force to avoid cracking the screen.
3. Disconnect the Battery
• Once the screen is separated, locate the battery connector. Disconnect the battery to ensure that there’s no power running through the device during repairs.
• Use a Phillips screwdriver to remove screws securing the battery connector, and then gently lift it off using a plastic prying tool.
4. Remove Internal Components Blocking the Charging Port
• If there are any cables, metal shields, or components obstructing access to the charging port, carefully remove them. Use a small Phillips screwdriver or tweezers to handle these parts.
• Keep track of the screws and components removed for reassembly.
5. Remove the Old Charging Port
• The charging port is typically located at the bottom of the iPad. Use a Phillips screwdriver to remove any screws holding it in place.
• Use Hot air and precision tweezers to gently pull the charging port when solder is melted.
6. Install the New Charging Port
• Position the new charging port into place, making sure the connectors align with the motherboard.
• Solder new charging port with soldering iron as shown in the above video.
7. Reassemble the iPad
• Reconnect the battery by carefully placing the battery connector back into position.
• Reinstall any internal components or metal shields that were removed during the disassembly process.
• Carefully align the screen with the iPad frame and press it into place. Be sure to remove any old adhesive residue before resealing the device.
8. Test the Charging Port
• Power the iPad back on and check if the charging port works correctly. Plug in a charger and ensure that it charges the device.
9. Final Assembly
• Once the new charging port is working, ensure that everything is securely in place and that the screen is properly attached to the frame.
• Power off the device one more time, and then fully reassemble it by tightening screws and checking for any loose parts.
________________________________________
Important Tips:
• Be Careful with the Screen: iPads have delicate displays, so always use plastic prying tools rather than metal tools to avoid damage.
• Document the Process: Take photos as you go, so you can remember the order and orientation of the components during reassembly.
• Work in a Clean Area: Avoid working on a soft surface like a carpet, which can generate static electricity or make it harder to find small parts.
If you’re unsure about any step or feel uncomfortable performing the repair, it’s always best to consult a professional technician. Or bring it to applefix & Tech engineers 937 victoria street Hamilton New Zealand or Call 078394111 or 078394188
Tuesday, 3 December 2024
Macbook Air A2681 2022 broken screen repair Hamilton New Zealand | Full Step By Step Guide

Macbook Broken Screen repair Experts In Hamilton New Zealand AppleFix
& Tech engineers Call 078394111 or visit 937 Victoria Street Hamilton New
Zealand. Macbook Air M2 Cracked screen repair full tutorial.
Macbook Air 2020 screen replacement general guide
Replacing the screen on a MacBook A2681 (which is part of the MacBook
Pro 14-inch model, likely released in 2021 or later) requires a precise
process, as Apple devices are known for their compact, intricate design. Below
is a general guide on how to replace the screen, but keep in mind that it's
crucial to have the right tools and the necessary replacement parts.
Tools and Equipment Needed:
Pentalobe screwdrivers
Tri-point screwdrivers
Suction handle or tool
Plastic opening tools
Spudger
ESD-safe tweezers
New screen replacement part
Anti-static wristband (optional, but recommended)
Step-by-Step Guide:
1. Power Off and Disconnect the Battery
Shut down the MacBook completely.
Unplug any connected peripherals or power cables.
If possible, disconnect the battery to prevent any accidental power on
during the repair (though this step may not be necessary for all models, it's a
good practice).
2. Remove the Bottom Case
Use a Pentalobe screwdriver (P5) to remove the screws around the bottom
of the MacBook.
Once all the screws are out, gently pry open the bottom case using a
plastic opening tool. Be careful not to damage the case or the internal
components.
3. Disconnect the Battery
Inside the MacBook, locate the battery connector and use a spudger or
plastic tool to disconnect it from the logic board. This step ensures that you
won't cause any electrical shorts or damage during the screen replacement.
4. Remove the Broken Screen
Place the MacBook on a flat surface.
You will need to remove the screws that hold the screen in place. These
are typically located around the hinges and the edges of the MacBook.
Use the appropriate screwdriver (likely a Pentalobe or Tri-point) to
unscrew the screws.
Once the screws are removed, use a suction cup or handle to carefully
lift the display assembly. If necessary, use a plastic opening tool to gently
separate the screen from the case. Be very gentle, as there are thin cables
connected to the screen.
5. Disconnect the Display Cables
After lifting the screen assembly, you will see the display cables that
connect the screen to the logic board.
Carefully disconnect these cables by lifting the connectors with a
spudger or tweezers. Be extra cautious not to damage the delicate cables.
6. Remove the Old Screen Assembly
Once all cables are disconnected, carefully remove the old screen from
the laptop body. Set it aside, as you will need to install the new screen.
7. Prepare the New Screen
Unbox the new screen carefully and make sure it is the correct part for
your MacBook model (A2681).
Check the new screen for any protective films or packaging that might
need to be removed.
8. Install the New Screen
Connect the display cables of the new screen to the logic board,
ensuring the connections are secure. Be very gentle to avoid damaging the
connectors.
Once connected, place the new screen assembly in the proper position
and align it with the hinges and mounting points.
9. Secure the Screen
Use the screws you removed earlier to secure the new screen to the
MacBook. Tighten them carefully, but avoid overtightening to prevent damaging
the threads.
10. Reconnect the Battery
Once the screen is in place, reconnect the battery connector to the
logic board. This will allow the laptop to power on once you close it.
11. Close the MacBook
Carefully align the bottom case back onto the MacBook.
Reinstall all the screws using the Pentalobe screwdriver.
Ensure all screws are tightly in place, but again, avoid
overtightening.
12. Power On and Test the Screen
Power on the MacBook and check if the new screen is working properly.
Test the screen's display, touch functionality (if applicable), and
brightness controls.
If everything works correctly, the screen replacement is complete.
Final Notes:
If you’re unsure or uncomfortable with the process, consider taking
your MacBook to an authorized repair center or a professional technician.
Apple’s warranty may be voided if you perform the repair yourself, so
it’s good to consider alternatives if you’re still under warranty.
Be cautious of the environment; static electricity can damage the
internal components, so it's always a good idea to work on an anti-static mat
or use an anti-static wrist strap.
By following these steps carefully, you should be able to replace the
screen on your MacBook A2681. Not confident enough bring it to applefix &
tech engineers Hamilton New Zealand @ 937 victoria street Hamilton New Zealand
Featured places
Friday, 29 November 2024
ipad air 5 a2589 A2588 A2591 broken screen replacement in hamilton new zealand

iPad repair experts in Hamilton New Zealand AppleFix & Tech Engineers Call 078394111 or visit 937 Victoria street Hamilton New Zealand. ipad air 5 lcd screen replacement guide Replacing the LCD screen on an iPad Air 5 (5th generation) can be a challenging task. If you’re confident with electronics repair, here’s a general guide for replacing the LCD screen. Please ensure you’re using the proper tools, have the necessary parts, and take safety precautions to avoid damaging the device. Note: This is a general overview, so make sure to check for any specific instructions for your iPad Air model.
Replacing the screen on an iPad Air 5 (5th generation) requires precision, patience, and the right tools. If you’re not experienced with electronic repairs, it may be best to take the device to a professional technician. However, if you are confident in your ability to do the repair yourself, here is a step-by-step guide.
Tools Needed:
Pentalobe screwdriver (P2)
Tri-point screwdriver (Y000)
Suction cup tool
Plastic pry tools
Plastic cards
Heat gun or hair dryer
SIM card ejector tool (if needed)
Tweezers
ESD-safe mat (optional but recommended)
Replacement screen (ensure compatibility with iPad Air 5)
Adhesive strips or glue
Precautions:
Work in a clean, static-free environment.
Power off your iPad completely before starting.
Make sure the replacement screen is fully functional and comes with adhesive or adhesive strips.
Step-by-Step Guide:
- Power Off the iPad Air 5
Hold down the power button and swipe to turn off the iPad.
- Remove the SIM Card Tray (if applicable)
Use a SIM card ejector tool to remove the SIM card tray from the side of the iPad if your model has one.
- Remove the Screws
Use a Pentalobe screwdriver (P2) to remove the screws from the bottom edge of the iPad Air 5. These screws secure the screen to the device.
- Heat the iPad
Use a heat gun or hair dryer to heat the edges of the iPad for about 2-3 minutes. This softens the adhesive holding the screen in place, making it easier to remove.
Warning: Be cautious not to overheat the device or focus heat on a single area for too long.
- Create a Gap
Use a suction cup tool to gently pull up on the screen near the bottom of the iPad. Once you have a small gap, insert a plastic pry tool or card into the gap. Work your way around the edge, gently separating the screen from the device.
Take your time with this step to avoid cracking the screen. Work slowly and apply gentle pressure.
- Disconnect the Battery
Once you’ve separated the screen, don’t completely remove it yet. You need to disconnect the battery to avoid any electrical damage.
Use a Tri-point screwdriver (Y000) to remove screws securing the metal shield over the battery connector.
Use a plastic pry tool to disconnect the battery connector. This step is essential for safety before removing any further components.
- Disconnect the Display Cable
After disconnecting the battery, use your pry tool to remove the screws holding the shield in place for the display cable.
Disconnect the display cable carefully. It’s a ribbon cable, so take care not to tear or bend it.
- Remove the Broken Screen
Once all connectors are disconnected, you can fully remove the broken screen.
Be careful of any remaining adhesive, as it can stick to the edges of the device. You may need to use a plastic card to remove excess adhesive gently.
- Prepare the New Screen
If your replacement screen does not come with adhesive, you’ll need to apply new adhesive strips around the edges of the new screen.
Take the new screen and ensure it is free of dust or debris. Make sure the display cable and connectors are properly aligned.
- Connect the New Screen
First, reconnect the display cable to the motherboard.
Reattach the shield and secure it with the screws you previously removed.
Next, reconnect the battery. Ensure the battery connector is firmly in place.
- Test the New Screen
Before sealing the screen completely, power on your iPad and check if the new screen works properly (touch responsiveness, display brightness, etc.).
If everything works, turn off the iPad again.
- Seal the Screen
Carefully align the screen with the iPad and press it into place. If adhesive strips are used, they will hold the screen in place as you press it down. If you’re using glue, apply it along the edges before sealing the screen.
Reinsert and tighten the screws around the edges of the iPad.
- Reassemble the Device
Replace the screws on the bottom of the device.
Reinsert the SIM card tray (if applicable).
- Test the iPad
Turn on the device and test the new screen. Check for functionality of touch sensitivity, display quality, and overall performance.
Conclusion:
Once you’re sure everything is properly connected and working, your screen replacement is complete! Remember, if you’re not confident or encounter problems during the repair, it’s always best to seek professional help to avoid further damage. or Bring it to appleFix & Tech engineers ar 937 Victoria Street Hamilton New Zealand or Call 078394188 or 078394111
We specialize in logic board and liquid damage repair and can fix your Laptop, MacBook, mobile phone , ipad, iphone , tablet , playstation, xbox or any other electronic gadget that has been deemed unfixable by another repair shop.
*Have a repair shop and are looking to outsource logic board repairs? We offer discounted repairs to other repair shops, schools, large organizations and government agencies. — https://applefix.co.nz/contact/
logicboard repair course in New Zealand
Skill development Job Oriented short Training course. In Latest Gadgets, Smart Mobile Phones, Tablets, Laptops, Desktops, gaming gadget, Playstation, Xbox Repair Technology.
This course is aimed / focused, to teach you to fix most common repairs an electronics repair shop could face in a practical working environment. Start your own business or increase your chances to get job quickly. https://applefix.co.nz/logicboard-repair-course/
Mail in device info read here https://applefix.co.nz/send-your-device/
Tuesday, 26 November 2024
MacBook A2941 M2 2023 15" Not Turning on, Liquid Damaged, Shorted, Steps to fix water damaged macbook

Macbook Repair Experts in Hamilton New Zealand Call
078394111 or Visit 937 Victoria Street Hamilton New Zealand.
MacBook 15" 2023 M2 A2941 badly water damaged on
multiple places, Important steps to fix water damaged macbook how to use
ultrasonic machine to wash water damaged logiboard.
We specialize in logic board and liquid damage repair and
can fix your Laptop, MacBook, mobile phone , ipad, iphone , tablet ,
playstation, xbox or any other electronic gadget that has been deemed unfixable
by another repair shop.
*Have a repair shop and are looking to outsource logic board
repairs? We offer discounted repairs to other repair shops, schools, large
organizations and government agencies. — https://applefix.co.nz/contact/
logicboard repair course in New Zealand
Skill development Job Oriented short Training course. In
Latest Gadgets, Smart Mobile Phones, Tablets, Laptops, Desktops, gaming gadget,
Playstation, Xbox Repair Technology.
This course is aimed / focused, to teach you to fix most
common repairs an electronics repair shop could face in a practical working
environment. Start your own business or
increase your chances to get job quickly.
https://applefix.co.nz/logicboard-rep...
Mail in device info
read here https://applefix.co.nz/send-your-device/
Friday, 1 November 2024
ipad 10th generation A2757 Screen replacement Tutorial for DIY repair. iPad repair experts Hamilton
watch full video here https://applefix.co.nz/blog/ipad-10th-lcd-screen-replacement-hamilton-new-zealand
ipad A2757 broken lcd screen repair Full Guide step by step. iPad
repair experts hamilton New Zealand call 078394111 or visit 937 victoria street
Hamilton New Zealand
We specialize in logic board and liquid damage repair and can fix your
Laptop, MacBook, mobile phone , ipad, iphone , tablet , playstation, xbox or
any other electronic gadget that has been deemed unfixable by another repair
shop.
*Have a repair shop and are looking to outsource logic board repairs?
We offer discounted repairs to other repair shops, schools, large organizations
and government agencies. — https://applefix.co.nz/contact/
Skill development Job Oriented short Training course. In Latest
Gadgets, Smart Mobile Phones, Tablets, Laptops, Desktops, gaming gadget,
Playstation, Xbox Repair Technology.
This course is aimed / focused, to teach you to fix most common repairs
an electronics repair shop could face in a practical working environment. Start your own business or increase your
chances to get job quickly.
https://applefix.co.nz/logicboard-repair-course/
Mail in device info read here
https://applefix.co.nz/send-your-device/

Tuesday, 1 October 2024
How to replace Samsung S24 Ultra Screen? Full Guide / Tutorial, Samsung repair hamilton new zealand
Samsung S24 Ultra Broken Screen replacement Step by Step
Guide | Samsung Repair In Hamilton New Zealand Call 078394111 or visit 937
Victoria Street hamilton @ AppleFix 7 Tech engineers
Replacing the screen on a Samsung Galaxy S24 Ultra can be
complex, and it's recommended to proceed with caution. Here’s a general guide
to help you through the process:
Replacing the screen on a Samsung Galaxy S24 Ultra can be complex, and
it's recommended to proceed with caution. Here’s a general guide to help you
through the process:
Tools Needed
Heat gun or hair dryer
Suction cup tool
Plastic spudger or opening tool
Phillips screwdriver (small)
Tweezers
Replacement screen
Adhesive strips (if needed)
Anti-static wrist strap (optional but recommended)
Step-by-Step Guide
1. Power Off the Device
Turn off your Galaxy S24 Ultra to avoid any electrical damage.
2. Remove the SIM Card Tray
Use a SIM eject tool to remove the SIM card tray.
3. Heat the Edges
Use a heat gun or hair dryer to warm up the edges of the phone. This
helps soften the adhesive holding the screen in place.
4. Create a Gap
Attach a suction cup to the screen. Gently pull to create a small gap
between the screen and the frame. Use a plastic spudger to insert into the gap.
5. Pry Open the Screen
Carefully slide the spudger around the edges to detach the adhesive. Be
cautious of any cables or components inside.
6. Disconnect the Battery
Once the screen is slightly lifted, locate the battery connector. Use a
Phillips screwdriver to remove the screws holding the cover in place, then
gently disconnect the battery.
7. Remove the Broken Screen
Disconnect the screen by unscrewing the necessary screws and using a
spudger to lift the connector. Carefully remove the broken screen from the
device.
8. Install the New Screen
Place the new screen into position. Connect the screen cable and ensure
it's secured.
9. Reconnect the Battery
Reconnect the battery, ensuring the connection is firm.
10. Test the Device
Before sealing everything back up, power on the device to test the new
screen. Make sure touch functions and display quality are working properly.
11. Seal the Device
If everything is functioning, proceed to reattach the screen. Use
adhesive strips to secure it, ensuring a tight fit.
12. Reinsert the SIM Card Tray
Finally, reinsert the SIM card tray and power on your device.
Tips
Be Patient: The process can be delicate; take your time.
Stay Grounded: Use an anti-static wrist strap to prevent damage to
components.
Consider Professional Help: If you’re uncomfortable with any step, it
might be best to take it to a professional repair service.
Warnings
Opening your device may void any warranty.
Be aware of your local laws regarding device repair.
If you're unsure about any part of the process, consulting a
professional or referring to detailed video tutorials can be very helpful.
Thursday, 26 September 2024
amazon kindle battery replacement HDX 7 c9r6qm | Amazon kindle repair hamilton new zealand
amazon kindle battery replacement HDX 7 c9r6qm | Amazon kindle repair
hamilton | AppleFix NZ
amazon Kindle Fire HDX 7" not charging, battery replacement | DIY
repair guide.
amazon kindle repair in Hamilton New Zealand Call 078394111 or visit
937 Victoria street Hamilton
How to replace amazon kindle battery ?
Replacing the battery in an Amazon Kindle can be a bit tricky, as it
involves opening the device. Here’s a general guide on how to do it:
Tools Needed:
Small Phillips screwdriver
Plastic opening tool or a flat tool
Replacement battery (specific to your Kindle model)
Steps to Replace the Battery:
Power Off the Device: Ensure your Kindle is completely turned off.
Remove the Back Cover:
Use the plastic opening tool to carefully pry off the back cover. Start
at a corner and gently work your way around.
Be cautious not to damage any clips or the casing.
Locate the Battery:
Once the back cover is off, you should see the battery. It’s usually
secured with screws or adhesive.
Disconnect the Battery:
If there are screws, remove them using the Phillips screwdriver.
Carefully disconnect the battery connector from the motherboard.
Remove the Old Battery:
If it’s glued in, gently pry it out. Be careful to avoid damaging any
surrounding components.
Install the New Battery:
Place the new battery in the same position as the old one.
Reconnect the battery connector to the motherboard.
Reassemble the Kindle:
Replace any screws you removed.
Snap the back cover back on, ensuring all clips are secure.
Power On Your Kindle:
Turn your device on and check if it’s functioning properly.
Important Notes:
Model Specifics: Different Kindle models may have different battery
types and disassembly procedures, so it's best to look up a specific guide for
your model.
Warranty Consideration: Opening your Kindle may void the warranty. If
you’re unsure or uncomfortable, consider reaching out to Amazon support or a
professional repair service.
If you need model-specific details or run into any issues, feel free to
ask!
Monday, 2 September 2024
xbox one s no display hdmi encoder 75dp159 qfn replacement | Xbox repair experts AppleFix

xbox one s no display hdmi encoder 75dp159 qfn replacement xbox repair
experts in hamilton new zealand call
078394111 937 victoria street hamilton New zealand
mail in repair read info here
https://applefix.co.nz/send-your-device
Replacing the HDMI encoder chip on an Xbox One S requires a certain
level of expertise in electronics and soldering. Here's a general guide on how
to replace the HDMI encoder chip (in this case, the 75DP159 QFN) when you're
experiencing a "no display" issue:
Materials Needed:
Replacement 75DP159 QFN chip.
Soldering iron with a fine tip.
Solder wire.
Flux.
Desoldering braid or desoldering pump.
Tweezers.
Heat gun or hot air rework station.
Soldering flux.
Isopropyl alcohol and a brush for cleaning.
Steps:
Prepare the Xbox One S: Open up the Xbox One S console using
appropriate tools. Be cautious and refer to guides specific to disassembling
the Xbox One S to avoid damaging it further.
Locate the HDMI encoder chip: Once you have the Xbox One S
disassembled, locate the HDMI encoder chip on the motherboard. This chip is
usually near the HDMI port.
Remove the old chip: Apply flux generously around the HDMI encoder
chip's solder points. Using a heat gun or a hot air rework station, carefully
heat up the solder joints of the chip until it becomes molten. Use tweezers to
gently lift the chip away from the motherboard. Be patient and avoid
overheating other components on the board.
Clean the area: After removing the old chip, clean the area around the
solder pads using isopropyl alcohol and a brush. Ensure that there is no
leftover flux or solder residue that could interfere with soldering the new
chip.
Prepare the new chip: Apply a small amount of solder to the pads of the
new 75DP159 QFN chip. Ensure that the solder is evenly distributed and not
excessive.
Position the new chip: Carefully position the new chip onto the solder
pads, ensuring that it aligns perfectly with the pads. Be very precise in
aligning the chip to avoid solder bridges or misalignment.
Solder the new chip: Using a soldering iron with a fine tip, reflow the
solder on each pad of the new chip. Be careful not to apply too much heat for
too long to prevent damaging the chip or the motherboard.
Clean the area: Once the soldering is complete, clean the area around
the new chip with isopropyl alcohol and a brush to remove any flux residue.
Reassemble the Xbox One S: After confirming that the new chip is
securely soldered in place and there are no solder bridges, reassemble the Xbox
One S console.
Test: Connect the Xbox One S to a display and power it on to test if
the "no display" issue has been resolved. If everything was done
correctly, you should now have a working display.
If you're not confident in your soldering skills or don't have
experience working with delicate electronics components, it may be best to seek
assistance from a professional repair service or someone with experience in
console repairs.
Subscribe to:
Posts (Atom)