Wednesday, 26 June 2024

Macbook air not turning on shorted u1900 Macbook repair Hamilton NZ


Call 078394188 937 victoria street Hamilton New Zealand clock signals SYSCLK_CLK32K_RTC and also the PPVRTC_G3H power rail. Macbook air dead, water damaged u1900 was replaced. macbook repair experts in hamilton new zealand send your device read instructions here https://applefix.co.nz/send-your-device/

We specialize in logic board and liquid damage repair and can fix your Laptop, MacBook, mobile phone , ipad, iphone , tablet , playstation, xbox or any other electronic gadget that has been deemed unfixable by another repair shop. *Have a repair shop and are looking to outsource logic board repairs? We offer discounted repairs to other repair shops, schools, large organizations and government agencies. — https://applefix.co.nz/contact/

logicboard repair course in New Zealand Skill development Job Oriented short Training course. In Latest Gadgets, Smart Mobile Phones, Tablets, Laptops, Desktops, gaming gadget, Playstation, Xbox Repair Technology. This course is aimed / focused, to teach you to fix most common repairs an electronics repair shop could face in a practical working environment. Start your own business or increase your chances to get job quickly. https://applefix.co.nz/logicboard-repair-course/ Mail in device info read here https://applefix.co.nz/send-your-device/

Monday, 24 June 2024

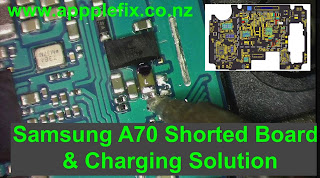
Samsung a70 not Turning on Shorted Board & not Charging Solutions | Samsung Repair Hamilton NZ


Samsung repair experts in Hamilton New Zealand AppleFix Hamilton NZ Call 078394111 125 ward street hamilton.

Samsung A705 Dead not charging watch full repair video

logicboard repair courses in New Zealand read full info here https://applefix.co.nz/logicboard-repair-course/

lcd refurbish course in New Zealand Read full info here https://applefix.co.nz/lcd-refurbish-course/

If you dont live in Hamilton send your device read procedure here https://applefix.co.nz/send-your-device/


Wednesday, 19 June 2024

samsung a51 not turning on samsung repairs in hamilton new zealand


Samsung A51 dead shorted logicboard and broken fpc connector repair.

samsung repair experts in hamilton new zealand  @ApplefixCoNz  New Zealand

Call 078394111 or 937 victoria street hamilton 3204

logicboard & microsoldering courses in new zealand

read full course info here https://applefix.co.nz/logicboard-repair-course/

If your Samsung A51 is not turningon, there are several steps you can try to troubleshoot and resolve the issue:

  1. Charge the Phone: Connect your Samsung A51 to a charger and let it charge for at least 15-20 minutes. Sometimes, a completely drained battery can prevent the phone from turning on.
  2. Force Restart: If the phone is charged but still not responding, try performing a force restart. To do this, press and hold the Power button and the Volume Down button simultaneously for about 10-15 seconds. This should force the device to restart.
  3. Check Power Button: Ensure that the Power button is not stuck or damaged. Press it a few times to see if it clicks normally.
  4. Check for Screen Damage: Inspect the screen for any physical damage. If the screen is damaged, it might prevent the phone from turning on properly.
  5. Boot into Safe Mode: If the phone starts up after the force restart, but you're experiencing issues with apps or settings, try booting into Safe Mode. Press and hold the Power button until the Samsung logo appears, then release the Power button and immediately press and hold the Volume Down button until the phone finishes restarting. In Safe Mode, only pre-installed apps are loaded, which can help determine if a third-party app is causing the problem.
  6. Check for Software Updates: Ensure that your phone has the latest software updates installed. Sometimes, updating the software can fix bugs that may be causing the issue.
  7. Factory Reset (Advanced Option): If none of the above steps work, you may consider performing a factory reset. Keep in mind that this will erase all data on your phone, so it's important to back up your data if possible. To perform a factory reset, you typically need to go to Settings > General management > Reset > Factory data reset. Use the volume buttons to navigate and the power button to select.
  8. Visit a Service Center: If the phone still does not turn on after trying these steps, there may be a hardware issue. In this case, it's best to visit an authorized Samsung service center or contact Samsung support for further assistance.

By following these steps, you should be able to diagnose and hopefully resolve the issue of your Samsung A51 not turning on.

Top of Form

Bottom of Form

If not bring it to experts @ 937 victoria street hamilton new Zealand or call 078394188


Friday, 5 April 2024

iphone water damage repair Hamilton new Zealand apple fix 125 ward street hamilton new zealand


iphone water damage repair Hamilton new Zealand

Badly water damaged iphone shorted pp-vdd-boost and pp-lcm-bl-anode this video also explain how to find short using thermal camera and freeze spray

iphone repair specialist in hamilton new zealand.

call 078394111 or visit 125 ward street hamilton New Zealand

mail in Repair read info here https://applefix.co.nz/send-your-device/

logicboard and microsoldering repair courses in New zealand read info here https://applefix.co.nz/logicboard-repair-course/


lcd refurbish course read info here https://applefix.co.nz/lcd-refurbish-course/

Tuesday, 2 April 2024

Nintendo Switch Light NOT Charging Charging port replacement nintendo Switch Repair Hamilton nz


Nintendo switch repair experts in hamilton New zealand Call 078394111 or visit 125 ward street hamilton www.applefix.co.nz

Mail in device read instructions here https://applefix.co.nz/send-your-device/


logicboard repair courses https://applefix.co.nz/logicboard-repair-course/


lcd refurbish courses https://applefix.co.nz/lcd-refurbish-course/


How to replace Nintendo switch charging port? read general guide below

Replacing the charging port on a Nintendo Switch can be a bit intricate and requires some technical skill. Here's a general guide on how you might go about it:


Tools Required:

Tri-wing screwdriver

Phillips head screwdriver

Tweezers

Plastic pry tool

Replacement USB-C charging port

Heat gun

Soldering Iron

Steps:

Prepare Your Workspace:


Find a clean, well-lit area to work in.

Lay down a soft cloth to prevent scratches to the screen or back of the Switch.

Power Down the Switch:


Ensure the Nintendo Switch is completely powered off before beginning any repairs.

Remove the Back Panel:


Use the tri-wing screwdriver to remove the screws from the back panel.

Gently pry off the back panel using a plastic pry tool. Be careful not to damage the plastic clips holding it in place.

Disconnect the Battery:


Inside, you'll find the battery connector. Use a plastic pry tool to disconnect it. This is important for safety reasons.

Locate and Remove the Charging Port:


The charging port is typically located at the bottom of the Switch.

Remove any screws securing the charging port in place.

Carefully disconnect any ribbons or cables attached to the charging port.

Replace the Charging Port:


Take your new USB-C charging port and connect any ribbons or cables to it.

Secure the charging port in place with the screws you removed earlier.

Reconnect the Battery:


Carefully reconnect the battery connector.

Replace the Back Panel:


Snap the back panel back into place, ensuring all clips are secured.

Replace the screws using the tri-wing screwdriver.

Test the Switch:


Before fully reassembling the Switch, it's wise to test if the new charging port is working properly.

Plug in the charger and ensure the Switch recognizes it and begins charging.

Reassemble the Switch:


Once you're sure the charging port is working, you can replace any remaining screws and fully reassemble the Switch.

Tips:

Be Patient: Take your time and don't rush the process. Rushing can lead to mistakes or damage to the device.

Keep Track of Screws: Use a magnetic mat or tray to keep track of screws and small parts during disassembly.

Watch Tutorials: If possible, watch video tutorials or read detailed guides specific to Nintendo Switch charging port replacements for visual guidance.

If you're uncomfortable performing this repair yourself, it might be best to seek assistance from a professional technician or repair service.
Sunday, 17 March 2024

ipad pro 10.5" No Display after screen replacement | ipad repair hamilton New Zealand | AppleFix

 ipad pro screen replacement if you not disconnecting the battery most likely you can burn filter or diod, ipad repair hamilton nz call 078394111 or visit 125 ward street hamilton new zealand

We specialize in logic board and liquid damage repair and can fix your Laptop, MacBook, mobile phone , ipad, iphone , tablet , playstation, xbox or any other electronic gadget that has been deemed unfixable by another repair shop. *Have a repair shop and are looking to outsource logic board repairs? We offer discounted repairs to other repair shops, schools, large organizations and government agencies. — https://applefix.co.nz/contact/

logicboard repair course in New Zealand Skill development Job Oriented short Training course. In Latest Gadgets, Smart Mobile Phones, Tablets, Laptops, Desktops, gaming gadget, Playstation, Xbox Repair Technology. This course is aimed / focused, to teach you to fix most common repairs an electronics repair shop could face in a practical working environment. Start your own business or increase your chances to get job quickly. https://applefix.co.nz/logicboard-rep... Mail in device info read here https://applefix.co.nz/send-your-device/

https://applefix.co.nz/blog/ipad-pro-105-no-display-after-screen-replacement-ipad-repair-hamilton-new-zealand


Sunday, 3 March 2024

laptop dc jack repair | Laptop Not Charging | laptop repairs in Hamilton New Zealand

 Laptop Not turning on or not charging . How to solder DC jack on the cable. Laptop dc jack repairs in Hamilton new Zealand125 ward street hamilton New Zealand Call 078394111Soldering Process for Replacing Laptop DC Jack: Prepare the New DC Jack: Ensure that the new

DC jack is compatible with your laptop model. Examine the soldering points on the new DC jack and make sure they match those on the motherboard. Prepare the Motherboard: Clean the soldering area on the motherboard using isopropyl alcohol and cotton swabs. This removes any dirt, dust, or residue that could interfere with the soldering process. Tinning the Soldering Points: Apply a small amount of solder to the soldering points on the motherboard and the corresponding terminals on the new DC jack. This process is called "tinning" and helps ensure good electrical conductivity during soldering. Positioning the New DC Jack: Carefully position the new DC jack on the motherboard, aligning it with the soldering points. Ensure it sits flush against the motherboard. Soldering: Heat up your soldering iron to the appropriate temperature for soldering electronic components. Hold the soldering iron against the soldering point on the motherboard and the corresponding terminal on the DC jack. Apply a small amount of solder to the joint. The solder should melt and flow smoothly, creating a solid connection between the two components. Repeat this process for each soldering point, ensuring that the connections are secure but not excessively soldered, which could cause shorts. Inspect the Solder Joints: After soldering all the connections, visually inspect the solder joints to ensure they are smooth, shiny, and without any bridges or cold solder joints. Use a magnifying glass if needed to check for any imperfections. Reassembly: Once you're satisfied with the soldering job, proceed with reassembling the laptop following the steps outlined in the previous guide. Testing: Before fully reassembling the laptop, perform a test to ensure the new DC jack is functioning properly. Connect the power adapter and battery and power on the laptop. Check if the laptop charges properly and if there are any issues with the power connection. Final Checks and Cleanup: Once you've confirmed that everything is working correctly, tidy up any loose wires and secure them with electrical tape or heat shrink tubing. Clean the laptop's exterior with a soft cloth and isopropyl alcohol if necessary. By following these steps carefully and using proper soldering techniques, you should be able to successfully replace the DC jack on your laptop. Remember to work slowly and carefully to avoid damaging any components. If you're not comfortable with soldering, consider seeking assistance from a professional technician. or bring it to applefix hamilton new zealand www.applefix.co.nz