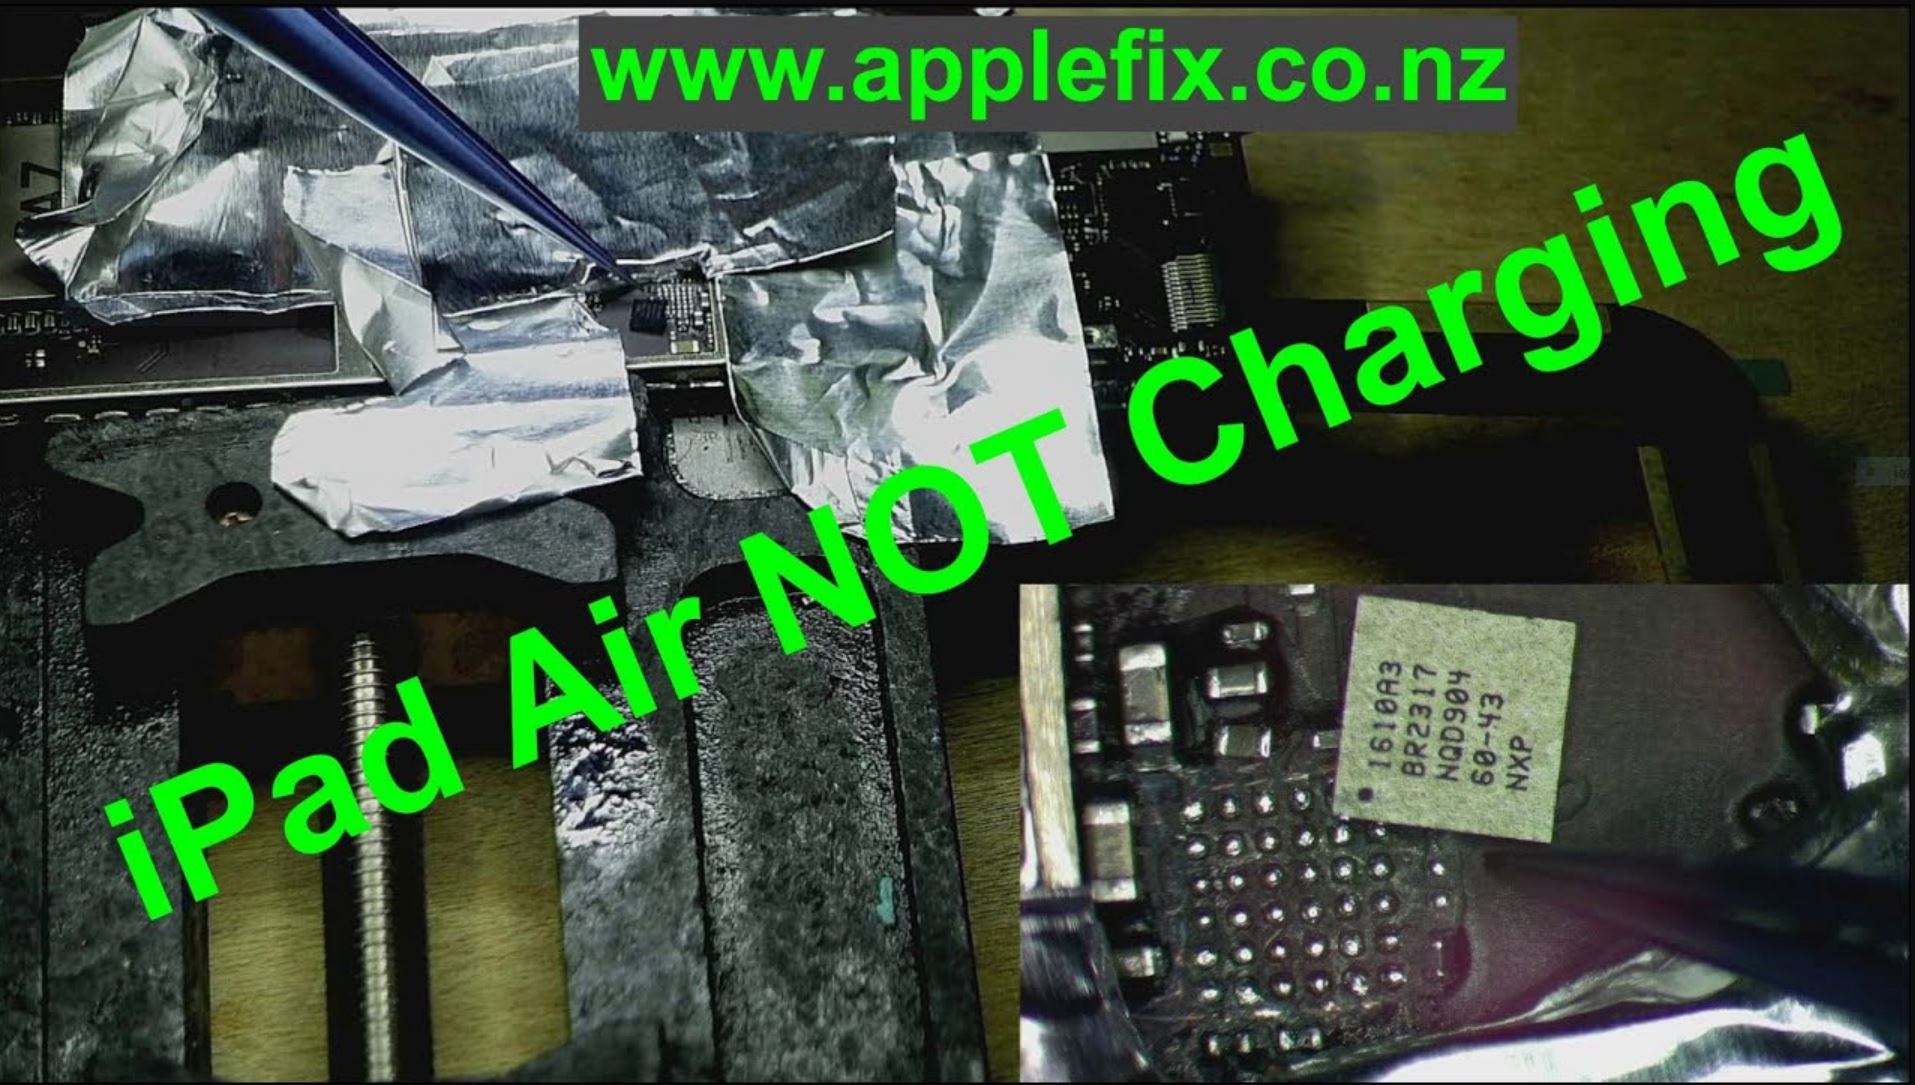
ipad air chrging port was
replaced but still not charging, tested charging ic 1610a3 was faulty replaced
and it charging fine Skill development Job Oriented short Training
course. In Latest Gadgets, Smart Mobile Phones, Tablets, Laptops, Desktops,
gaming gadget, Playstation, Xbox Repair Technology. This course is
aimed / focused, to teach you to fix most common repairs an electronics repair
shop could face in a practical working environment. Start your own business or
increase your chances to get job quickly. read info here
https://applefix.co.nz/logicboard-repair-course Mail in device read info here
https://applefix.co.nz/send-your-device We specialize in logic board and liquid damage
repair and can fix your Laptop, MacBook, mobile phone , ipad, iphone , tablet ,
playstation, xbox or any other electronic gadget that has been deemed unfixable
by another repair shop. *Have a repair shop
and are looking to outsource logic board repairs? We offer discounted repairs
to other repair shops, schools, large organizations and government agencies. —
https://applefix.co.nz/contact/ logicboard repair course in New Zealand Skill development Job Oriented short Training
course. In Latest Gadgets, Smart Mobile Phones, Tablets, Laptops, Desktops,
gaming gadget, Playstation, Xbox Repair Technology. This course is
aimed / focused, to teach you to fix most common repairs an electronics repair
shop could face in a practical working environment. Start your own business or
increase your chances to get job
Replacing the charging IC (Integrated Circuit) on an iPad
Air involves intricate soldering work and should be done with caution. If
you're not experienced with microsoldering or electronics repair, it's
recommended to seek professional assistance, as attempting these repairs
without proper expertise can lead to further damage. Here's a general guide for
informational purposes only:
Note: This information is for educational purposes, and I
am not responsible for any damage that may occur during the repair process.
Proceed at your own risk.
Tools and Materials Needed:
- Replacement
charging IC compatible with iPad Air.
- Microsoldering
iron with fine tips.
- Hot
air rework station.
- Soldering
flux.
- Solder
wick or desoldering braid.
- Tweezers.
- Magnifying
glass or microscope for precision work.
- Isopropyl
alcohol and a brush.
- ESD-safe
workplace and wrist strap.
Procedure:
- Prepare
Your Workspace:
- Ensure
you're working in an electrostatic discharge (ESD)-safe environment to
prevent damage to electronic components.
- Disconnect
Power:
- Power
off the iPad and disconnect it from any power source.
- Disassemble
the iPad:
- Follow
a disassembly guide specific to your iPad Air model to expose the logic
board.
- Locate
the Charging IC:
- Identify
the charging IC on the logic board. It is typically located near the
charging port.
- Apply
Soldering Flux:
- Apply
soldering flux to the charging IC and the surrounding components. This
helps in soldering and desoldering.
- Desolder
the Old Charging IC:
- Use
the hot air rework station and microsoldering iron to carefully desolder
the old charging IC. Use solder wick to clean up any remaining solder.
- Clean
the Area:
- Clean
the area around the charging IC with isopropyl alcohol and a brush.
- Place
the New Charging IC:
- Carefully
place the new charging IC in the correct orientation. Ensure proper
alignment.
- Solder
the New Charging IC:
- Use
the hot air rework station and microsoldering iron to solder the new
charging IC onto the logic board. Be precise to avoid damage to nearby
components.
- Inspect
Your Work:
- Inspect
the solder joints under a magnifying glass or microscope to ensure they
are clean and free of defects.
- Reassemble
the iPad:
- Put
the iPad back together in the reverse order of disassembly.
- Test
the Charging Functionality:
- Connect
the iPad to a power source and check if it charges properly.
If you are not confident in your microsoldering skills or if
the issue persists after the replacement, it's advisable to seek assistance
from a professional technician or a reputable repair service. Microsoldering requires
precision, and any mistakes could lead to further damage.
No comments:
Post a Comment